
Olcroy
Getting to know Olcroy
How to install Olcroy, open a pattern from the generator, change a measurement and print the pieces. And which built-in lesson to start with.
The generator on the site builds a pattern in a minute, but there you can change only the measurements and the eases. Olcroy is a free program for your computer that shows the whole construction: every point, line and formula. In it you can change a measurement and see at once how the pattern is redrawn, draw your own model and print the pieces.
This lesson is a short tour: installation, the program window, a file from the generator, printing. After that, the lessons inside the program itself will guide you.
Installation and first start
Olcroy runs on 64-bit Windows 10 (version 1809 or later) and Windows 11. Download the installer from the program’s page and run it.
In the installer, keep the associate files checkbox ticked: then the pattern and the measurements files will open with a double click.
On first start the program asks for the interface language. You can change it later: File → Preferences → Configuration.
The program window
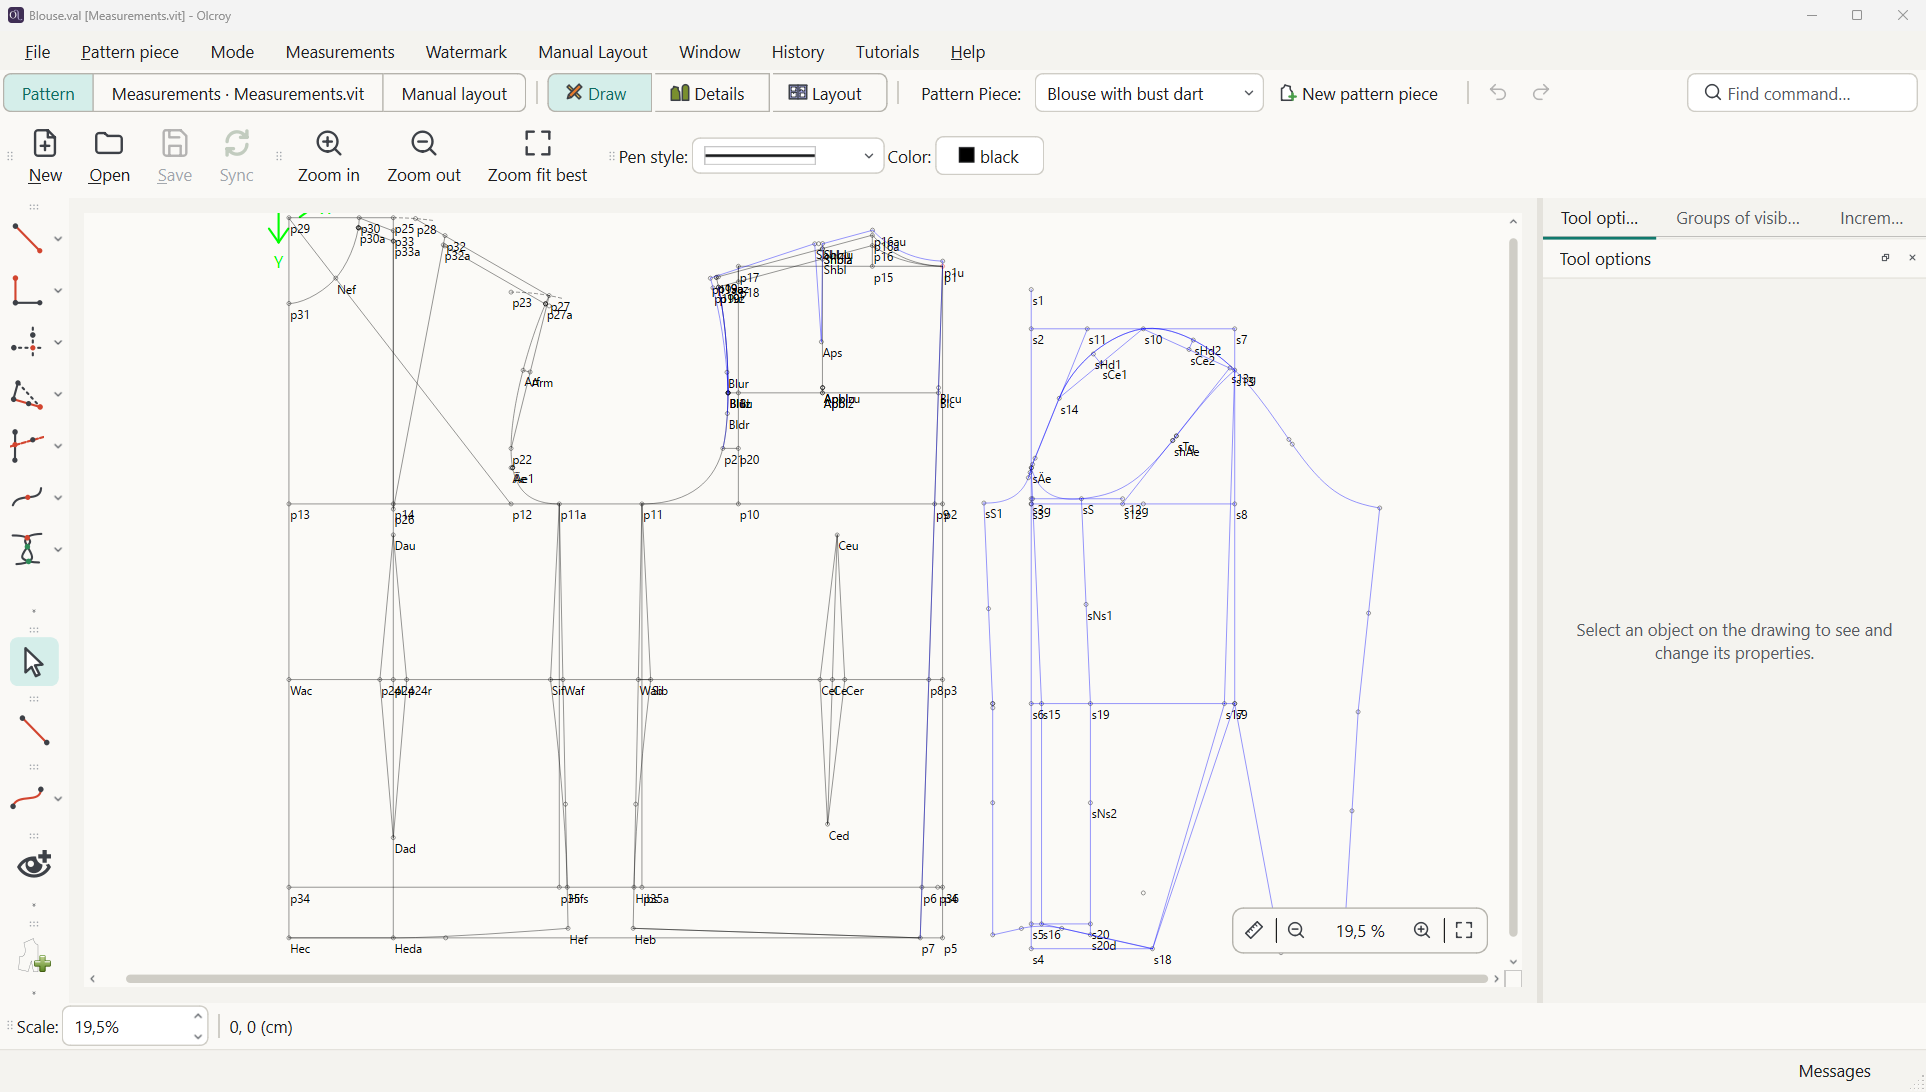
Olcroy has one window and three pages. Switch between them in the Window menu or with the keys:
- Pattern (Ctrl+1) — the construction: points, lines, curves and pieces. You will spend almost all your time here.
- Measurements (Ctrl+2) — the table of measurements of the open
.vitfile. - Manual layout (Ctrl+3) — the pieces on sheets, if you want to arrange them by hand.
The Pattern page has three modes, in the Mode menu:
- Draw (Ctrl+W) — the construction lines, as on a drafter’s sheet.
- Details (Ctrl+E) — only the pieces with their seam allowances.
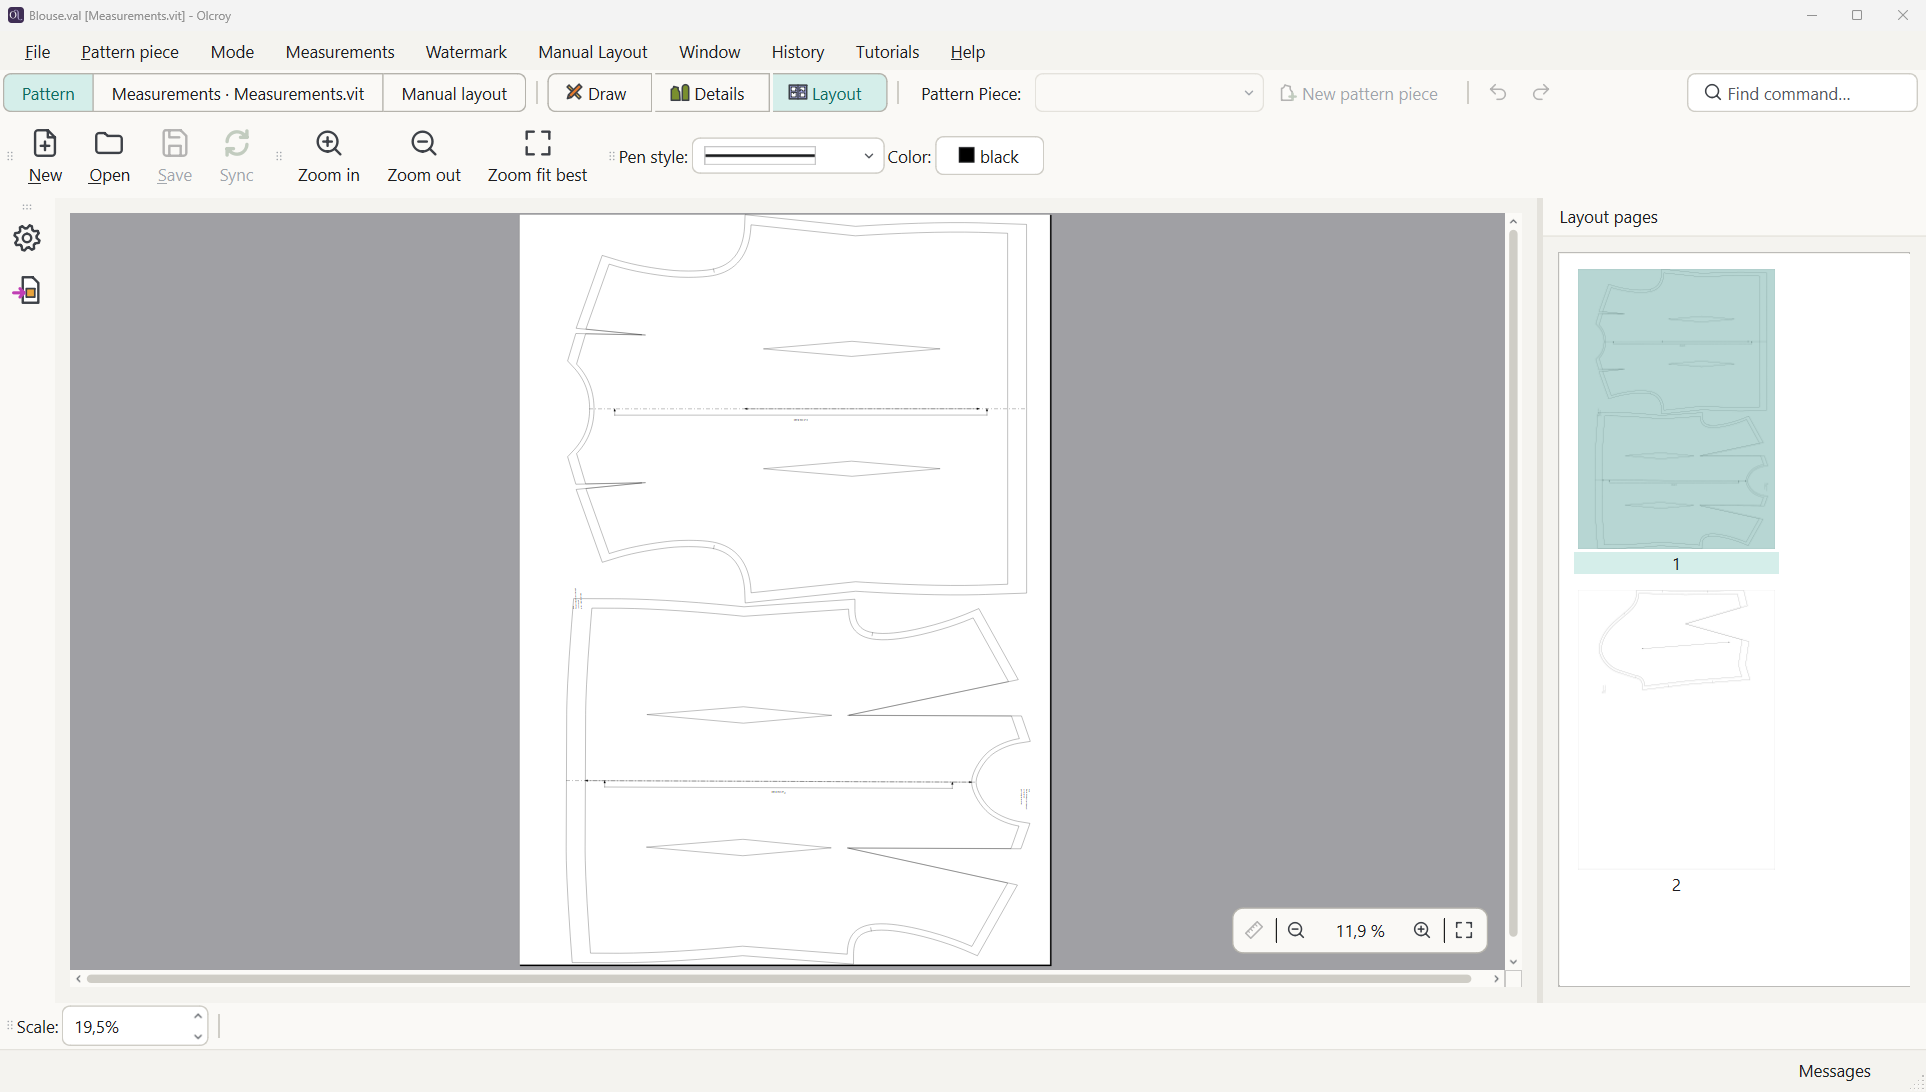
- Layout (Ctrl+L) — the pieces arranged on sheets of paper for printing.
If you cannot remember where a command is, press Ctrl+K and start typing its name: “measurements”, “print”, “export”. The program shows the command and runs it.
Open a pattern from the generator
In the generator, choose Olcroy (.val): draft and pieces from the Export menu. A .zip archive downloads; it holds two files: the pattern .val and the measurements file .vit.
- Unzip the archive into a separate folder. Both files must lie side by side.
- Open the
.valfile with a double click, or via File → Open (Ctrl+O).
The pattern remembers where its measurements file is, relative to itself. So if you move the pattern to another folder or another computer, move it together with the measurements file.
Change a measurement
Here is the main difference between Olcroy and the generator: the construction is not drawn again, it is recalculated by its formulas.
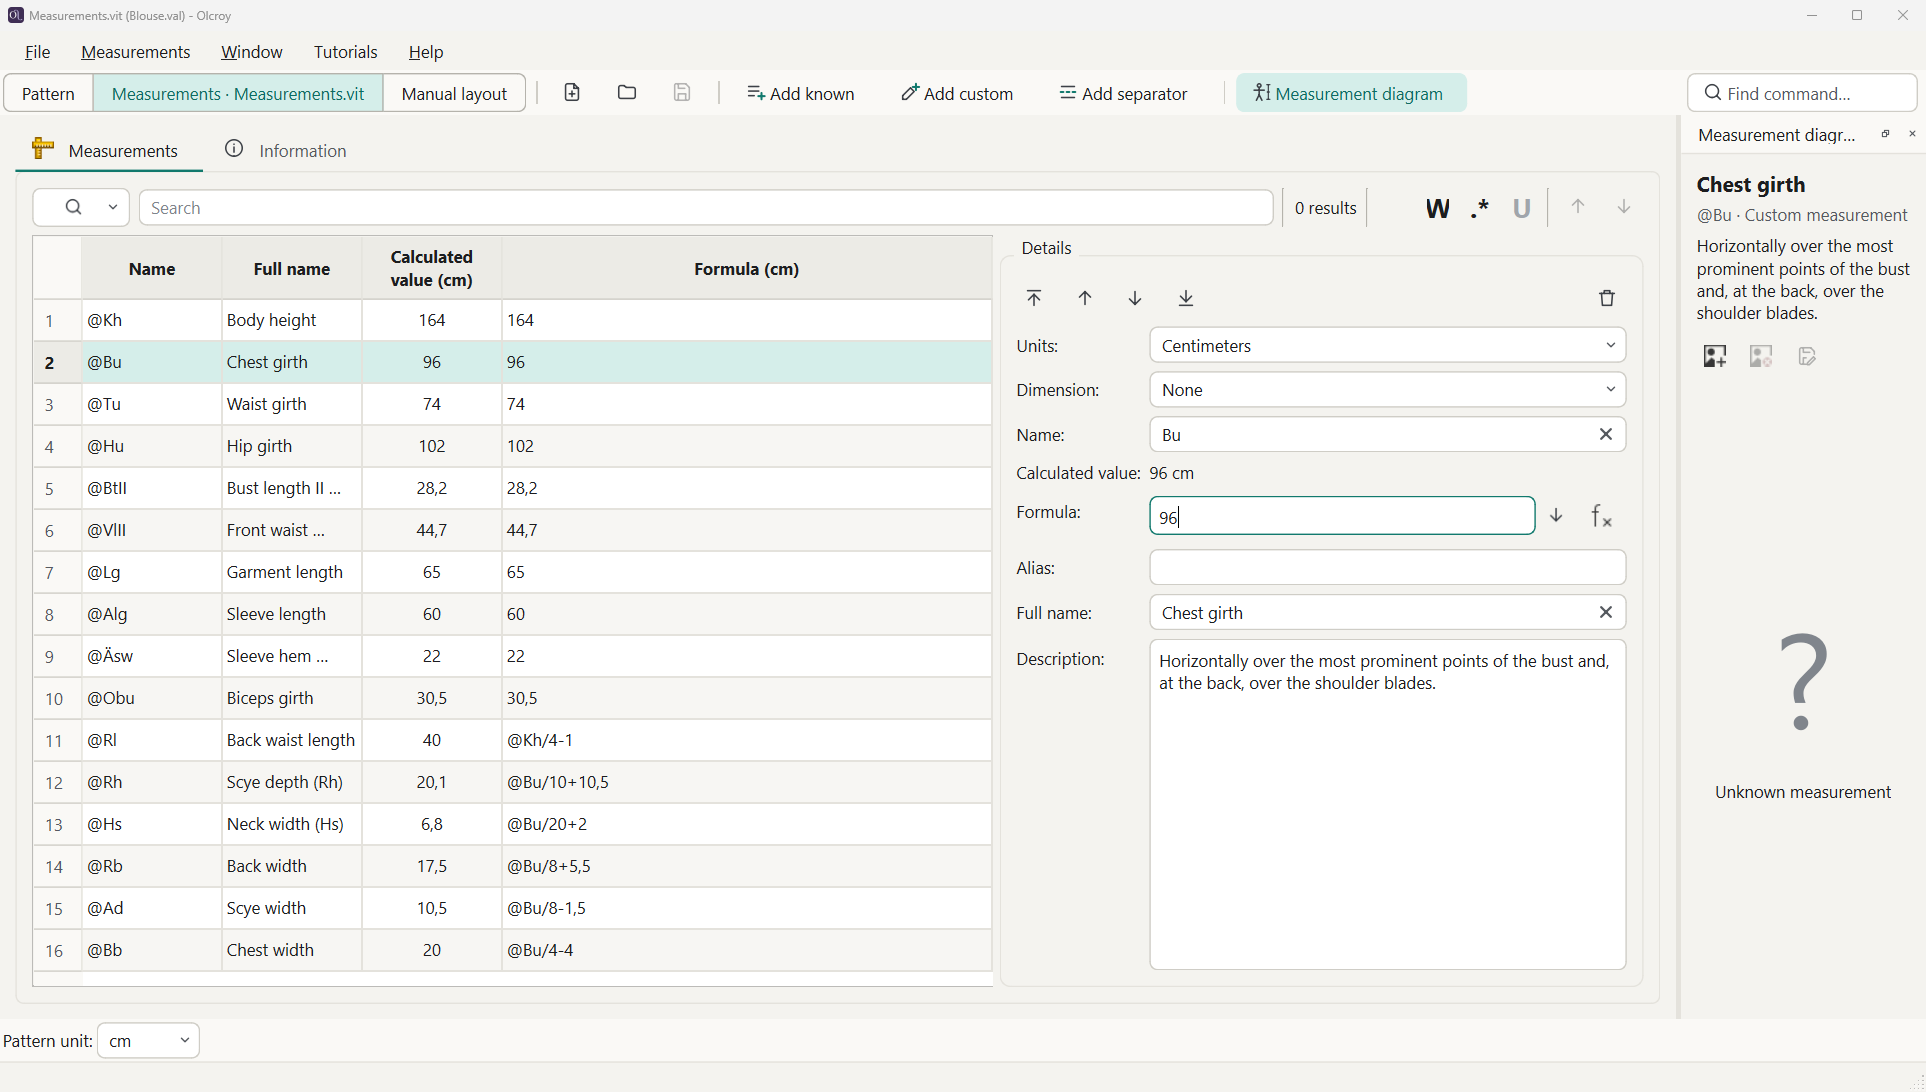
- Open the measurements: Measurements → Edit Current or Ctrl+2.
- Select a measurement in the table, for example the chest girth, and type the new value in the Formula field.
- Save the measurements file: Ctrl+S.
- Go back to the pattern (Ctrl+1). The program notices that the measurements have changed and asks: “Measurements were changed. Do you want to sync measurements now?” Answer Yes.
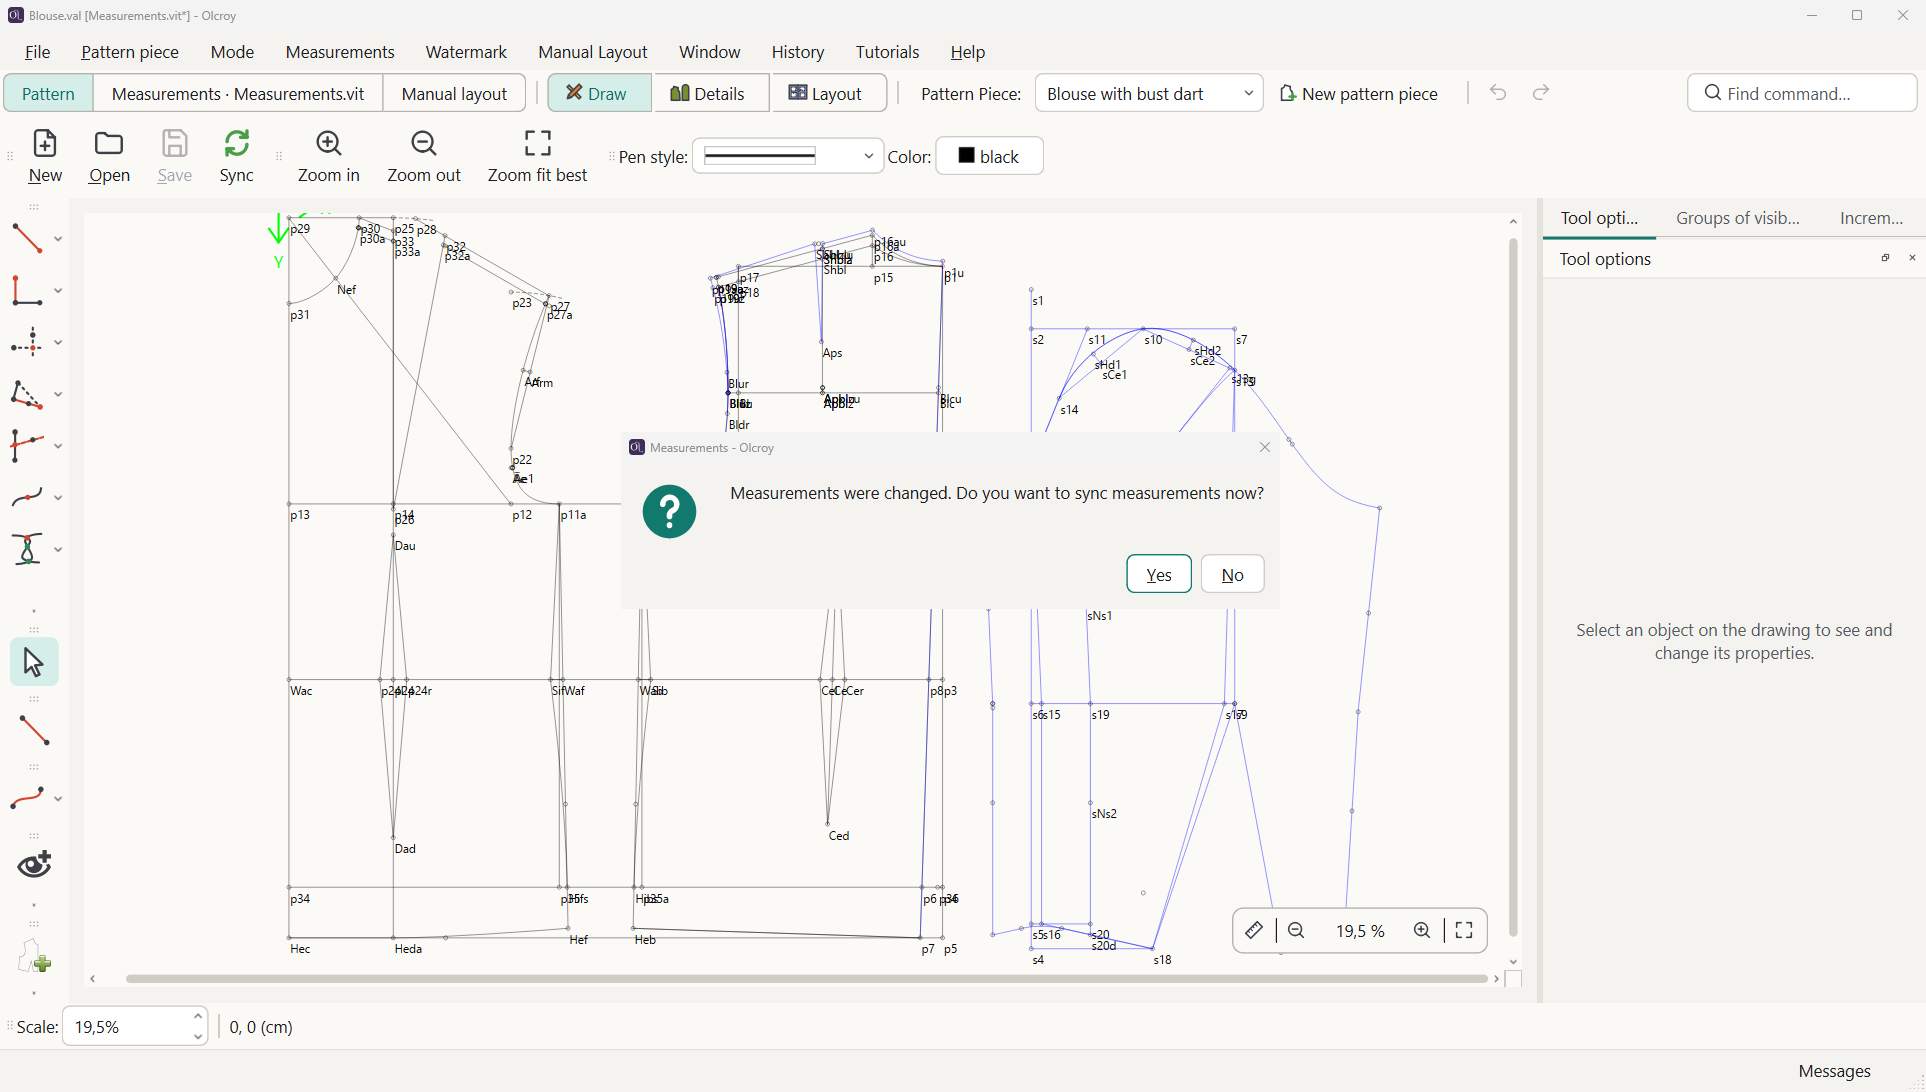
The pattern is redrawn: the points, lines and pieces that depend on this measurement move. If you answered No, you can sync later with Measurements → Sync.
Built-in lessons
The program teaches the rest itself. The lessons open from the Tutorials menu or the Tutorials button on the start page. A lesson does not do the work for you: it shows where a button is, waits until you press it and checks the result. Each lesson works on its own copy of the file, so it will not spoil your patterns.
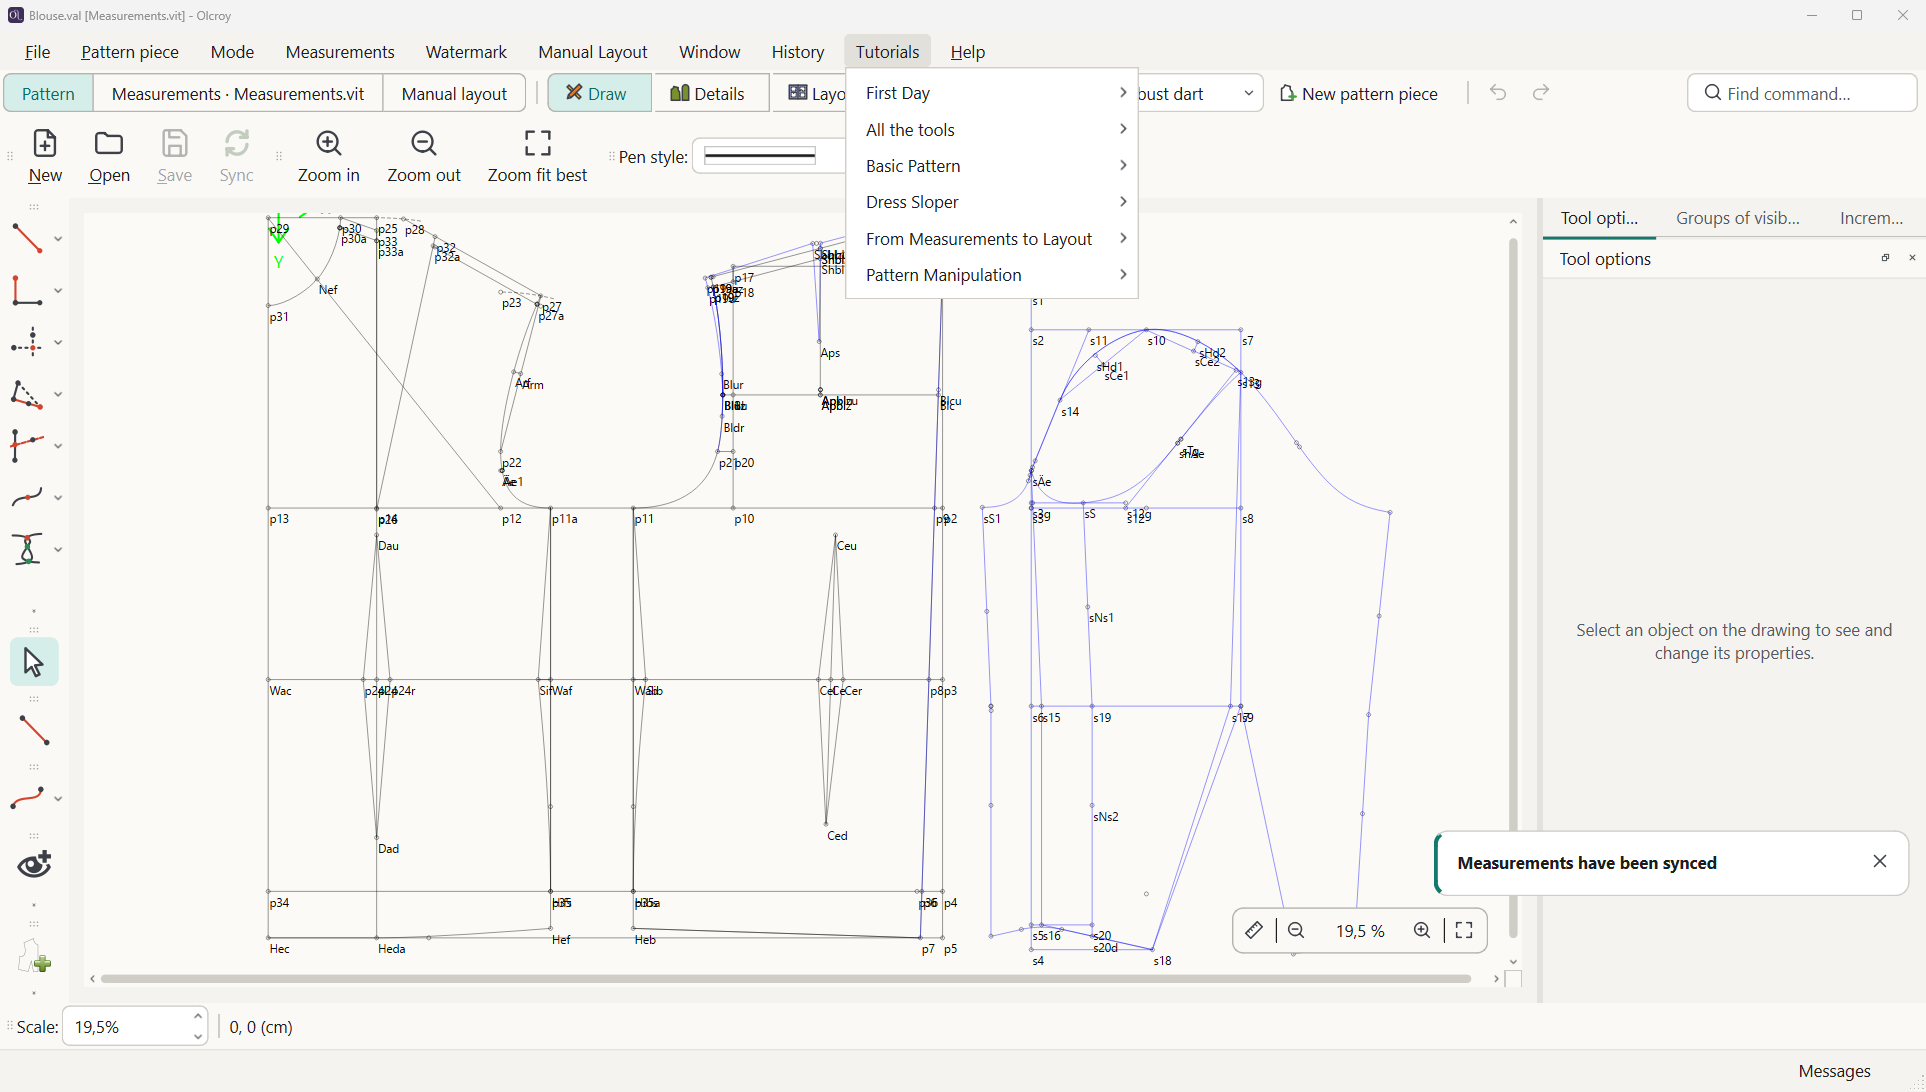
The lessons are grouped into six courses:
- First Day — the program window, command search, your own measurements file, a new pattern. Start with the lesson “The program window”.
- Basic Pattern — points, arcs, curves, a dart, a piece, a seam allowance.
- Dress Sloper — building the base of a dress step by step, from the measurements to the transfer of the shoulder line.
- From Measurements to Layout — a table of measurements for several sizes, the layout, exporting the pieces.
- Pattern Manipulation — moving a dart, the lines of a model, cutting and spreading.
- All the tools — one lesson per tool, for when you need a reference.
If you are only opening patterns from the generator for now, after First Day look at the course From Measurements to Layout: the lessons “Changing the size in a pattern”, “Layout settings” and “Exporting details”.
Export and printing
To print the pieces, first arrange them on sheets.
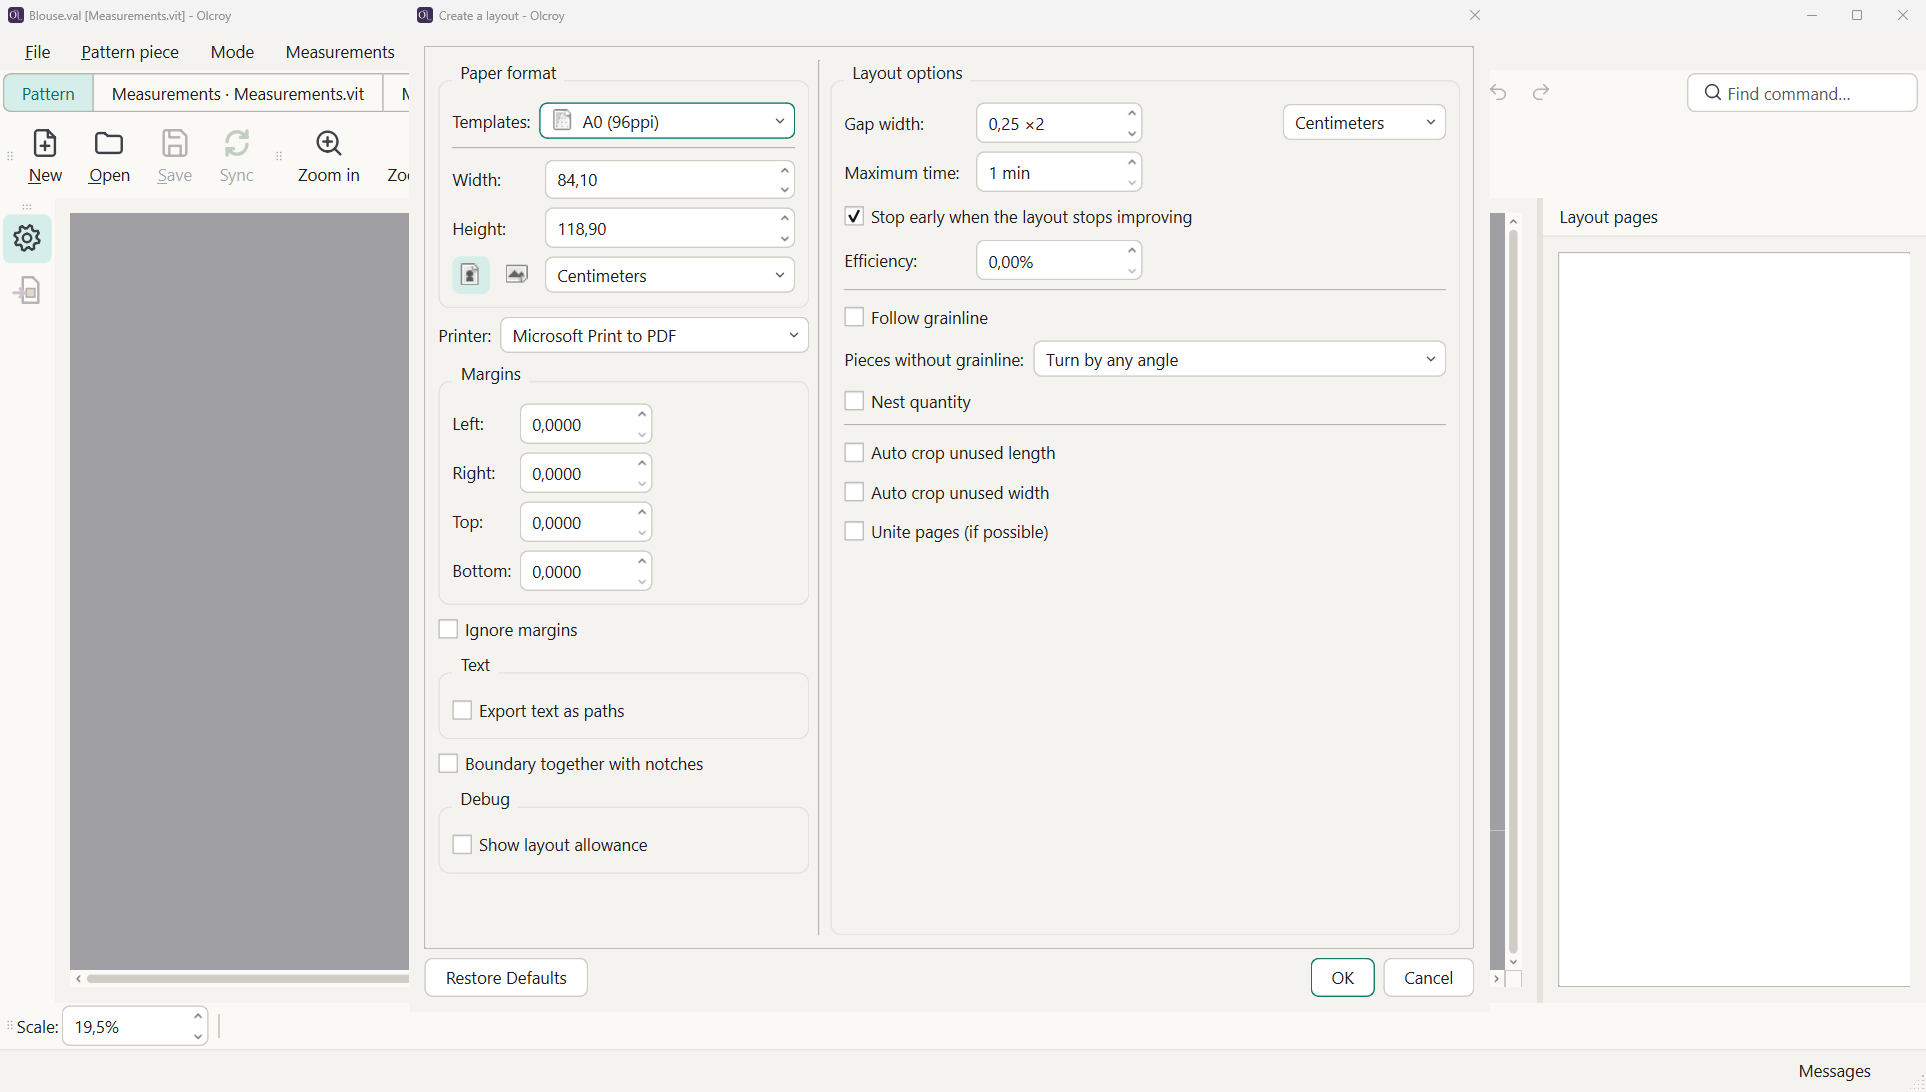
- Turn on the Layout mode: Mode → Layout or Ctrl+L. The first time, the Create a layout dialog opens straight away.
- Choose a large sheet. In the Paper format group, choose the A0 template. A full-size piece does not fit on A4, and the program will not make a layout on A4: tiled printing in step 4 splits the pattern into A4 sheets.
- Click OK. The program lays the pieces out on the sheets: the search takes a few seconds and stops by itself when the layout stops improving. The layout does not update by itself: if you change a measurement, open Layout settings and lay the pieces out again.
- Save the PDF for printing: File → Layout → Print tiled PDF. The pieces are split into A4 sheets, which you then glue together. Sheets with no piece on them are left out of the file. The other sheets keep their numbers (“Page 7 of 25”), so the numbering has gaps; no sheets are missing. If the program finds a way to fit the pieces on fewer sheets, the Print tiled window opens before printing: on the left “As laid out” with the current number of sheets, on the right “For printing” with fewer. Click Re-lay and print to save paper: the layout in the pattern window stays as it is, and every piece is printed. As is prints the layout unchanged. If nothing can be saved, the window does not appear. You can turn this offer off in Preferences → Pattern.
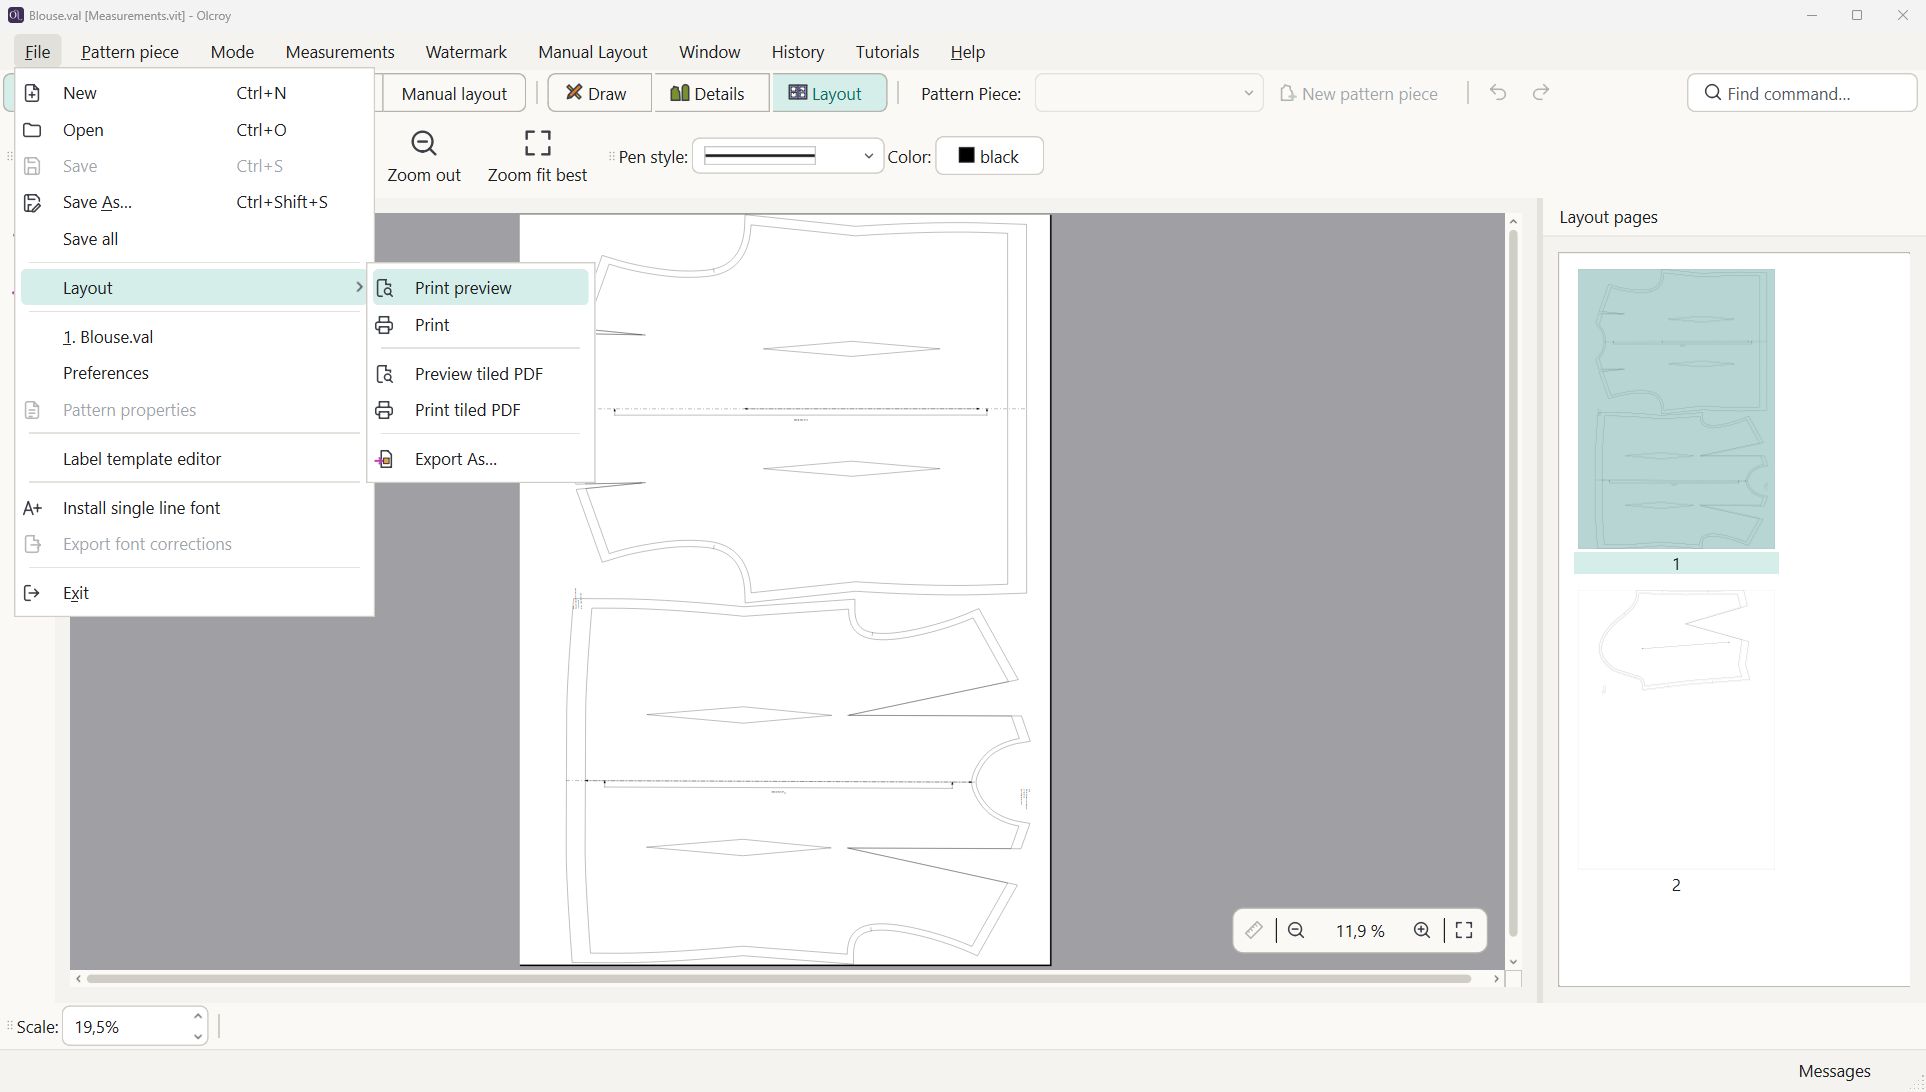
Other formats are in File → Layout → Export As…: a plain PDF on one large sheet for a plotter or a copy shop, SVG, PNG, and DXF for cutting software. Leave the scale in this dialog at 1 — it means actual size.
From here on it is the same as with a pattern from the generator; it is described in the lesson “Your first pattern: printing and gluing”:
- printing at 100 % scale — where this setting is in the Windows print dialog;
- checking the scale before gluing;
- gluing the sheets;
- print shop and plotter — what to tell the operator.